10 Best Calisthenics Back Exercises for a Stronger Upper Body
10 Best Calisthenics Back Exercises
Discover the 10 best back exercises for a stronger upper body! Perfect your calisthenics back workout with these bodyweight back exercises and beginner calisthenics tips.
Table of Contents
Benefits of Calisthenics for the Upper Body 10 Best Calisthenics Back Exercises
Calisthenics exercises for the upper body offer numerous advantages, making them a popular choice for many fitness enthusiasts. This section highlights how calisthenics can enhance upper body strength, flexibility, endurance, and overall fitness.
Strength Enhancement
- Muscle Engagement: Calisthenics engages multiple muscle groups simultaneously. Exercises like pull-ups, push-ups, and dips work the chest, shoulders, biceps, triceps, and back.
- Core Strength: Many calisthenics exercises require core stabilization, enhancing abdominal and lower back strength.
- Functional Strength: These exercises mimic daily movements, promoting functional strength useful in everyday activities.
Flexibility and Mobility
- Dynamic Movements: Calisthenics includes a range of motion that can improve joint flexibility and muscle elasticity.
- Bodyweight Control: Movements that require lifting one’s body weight can increase overall mobility and reduce the risk of injuries.
Endurance Building
- Cardiovascular Fitness: High-intensity calisthenics can elevate the heart rate, improving cardiovascular health and endurance.
- Muscle Endurance: Repetitive movements in calisthenics build muscle stamina, allowing for longer periods of physical activity without fatigue.
Convenience and Accessibility
- No Equipment Needed: Most calisthenics exercises require no gym equipment, making them accessible anywhere.
- Cost-Effective: With no need for gym memberships or specialized equipment, calisthenics is a cost-effective exercise option.
Body Coordination and Balance
- Proprioception: Calisthenics improves body awareness and coordination, essential for balance and avoiding falls.
- Neuromuscular Coordination: Complex movements enhance the connection between the nervous system and muscles, refining coordination.
Progressive Overload
- Adaptability: Calisthenics exercises can be modified to increase difficulty as strength improves, ensuring continuous progression.
- Scalability: Variations in intensity and volume allow for both beginners and advanced athletes to benefit.
Taking these benefits into account, it becomes clear why incorporating calisthenics into a fitness routine is advantageous for those looking to improve upper body strength and overall physical health.
How to Warm Up Properly
Warming up is essential before engaging in any intense physical activity, including calisthenics. A proper warm-up increases blood flow to the muscles, enhances flexibility, and reduces the risk of injury. Here is a step-by-step guide to warming up effectively:
- General Cardio
- Jogging in Place: Begin with jogging in place for 3-5 minutes. This activity elevates the heart rate and promotes blood circulation throughout the body.
- Jumping Jacks: Perform 2 sets of 20 jumping jacks. This full-body exercise helps to activate various muscle groups.
- Dynamic Stretching
- Arm Circles: Do arm circles for 30 seconds in both forward and backward directions. This movement warms up the shoulders and upper back.
- Leg Swings: Swing each leg forward and backward for 15 reps per leg. This helps loosen up the hip joints and prepares the legs for more vigorous activity.
- Specific Warm-Up Exercises
- Push-Ups: Complete 1-2 sets of 10-15 push-ups. This primes the chest, triceps, and core muscles before advancing to more complex movements.
- Pull-Up Holds: If available, hold the top position of a pull-up for 10-15 seconds. It activates the lats and upper back.
- Mobility Drills
- Thoracic Twists: Perform thoracic twists for 1-2 minutes. Stand with feet shoulder-width apart, and twist the torso from side to side. This improves upper back mobility.
- Scapular Retractions: Do 1-2 sets of 10-15 scapular retractions by hanging from a bar and pulling your shoulder blades together without bending your elbows. This targets the muscles around the shoulder blades.
- Joint Rotations
- Wrist Rotations: Rotate each wrist in circular motions for 30 seconds in both directions. This ensures the wrists are loose and ready for weight-bearing activities.
- Neck Rotations: Gently rotate the neck side-to-side and up-and-down for 1-2 minutes. This reduces stiffness and prepares the neck for supporting the head during exercises.
By following this structured warm-up routine, the body will be adequately prepared for the calisthenics exercises to come.
Pull-Ups: The Cornerstone of Back Workouts
Pull-ups are a fundamental exercise renowned for their ability to build a stronger upper body. As a bodyweight exercise, they require minimal equipment, typically just a sturdy bar positioned above the head. This exercise primarily targets the latissimus dorsi muscles while also engaging the biceps, forearms, shoulders, and core.
Form and Technique
- Grip the Bar: Use a shoulder-width overhand grip. Ensure knuckles face forward and thumbs wrap around the bar for a secure hold.
- Engage Core Muscles: Tighten abdominal muscles to maintain stability and prevent swinging.
- Pull Up: Drive elbows down and back, pulling the chin above the bar. Keep the neck neutral to avoid unnecessary strain.
- Lower Down: Control the descent, fully extending arms without locking elbows. This ensures muscle tension is maintained throughout the movement.
Variations
- Chin-Ups: Use an underhand grip to put more emphasis on the biceps.
- Wide-Grip Pull-Ups: Increase the distance between hands to enhance the focus on the latissimus dorsi.
- Commando Pull-Ups: Alternate grips by holding the bar parallel to the body, enhancing grip strength and engaging the core.
Progressions
- Negative Pull-Ups: Focus on the eccentric portion by jumping to the top position and lowering slowly.
- Assisted Pull-Ups: Use resistance bands or an assisted pull-up machine to reduce body weight.
- Weighted Pull-Ups: Add weight using a dip belt once standard pull-ups become manageable.
Common Mistakes
- Kipping: Avoid using momentum to swing the body upward.
- Partial Range of Motion: Ensure full extension at the bottom and chin above the bar at the top.
- Incorrect Grip: A proper grip ensures better muscle engagement and reduces the risk of injury.
Benefits
- Muscle Strength: Significantly enhances upper body muscle strength.
- Functional Fitness: Improves everyday physical tasks by developing functional strength.
- Posture Improvement: Strengthens the back muscles, aiding in better posture.
Pull-ups remain indispensable for their simplicity, effectiveness, and the broad range of muscles they target. They are a testament to the power of bodyweight exercises in strengthening the upper body.
Chin-Ups: Variation for Better Upper Back Engagement
Chin-ups are a staple in calisthenics training, known for effectively targeting the upper back muscles and biceps. By incorporating several variations, individuals can enhance upper back engagement, ensure muscle balance, and reduce monotony in their workout routines.
Basic Chin-Up Technique
- Grip Position: Begin by gripping the bar with palms facing the body, hands shoulder-width apart.
- Starting Position: Hang with arms fully extended and feet off the ground.
- Execution: Pull the body upward until the chin is above the bar, squeezing the shoulder blades together.
- Descent: Lower the body back to the starting position with controlled movement.
Variations to Enhance Upper Back Engagement
Narrow-Grip Chin-Ups
- Grip: Closer hand placement (less than shoulder-width apart).
- Target: Increases emphasis on the biceps and upper back.
- Benefit: Greater range of motion and intense contraction of the back muscles.
Wide-Grip Chin-Ups
- Grip: Wider than shoulder-width apart.
- Target: Works on the lats and upper back more intensely.
- Benefit: Spreads load across the back muscles, enhancing upper back strength and width.
Weighted Chin-Ups
- Addition: Use a weight belt or hold a dumbbell between the feet.
- Intensity: Adds resistance for increased muscle growth and strength.
- Benefit: Effective for advanced training and breaking plateaus.
Form Tips for Optimal Engagement
- Posture: Maintain an upright posture with a slight arch in the lower back.
- Elbow Position: Keep elbows close to the body during the ascent.
- Scapular Movement: Actively retract and depress the scapula at the start of the pull.
Integrating Chin-Ups into a Routine
- Warm-Up: Always begin with a warm-up to prepare the muscles and joints.
- Frequency: Include chin-ups 2-3 times per week.
- Sets and Reps: Start with 3-4 sets of 6-10 repetitions, adjusting based on fitness levels.
Using these variations of chin-ups, individuals can significantly enhance their upper back engagement, leading to a stronger, more balanced upper body.
Inverted Rows: Balanced Back Development
Inverted rows serve as a staple calisthenics exercise for those aiming to achieve a balanced back development. This bodyweight exercise targets several muscle groups in the upper body, including the latissimus dorsi, trapezius, and rhomboids, while also engaging the biceps and forearms.
How to Perform Inverted Rows
- Find a Bar: Seek a sturdy horizontal bar or use a suspension trainer. Ensure the bar is at waist height.
- Positioning: Lie beneath the bar, then grab it with an overhand grip, ensuring your hands are shoulder-width apart.
- Body Posture: Your body should form a straight line from head to heels, with legs extended and heels touching the ground.
- Row Motion: Engage your core and pull your chest towards the bar by squeezing your shoulder blades together.
- Lowering Phase: Slowly lower your body back to the starting position, maintaining control throughout the movement.
Benefits of Inverted Rows
- Muscle Activation: Inverted rows activate multiple upper body muscles simultaneously, leading to comprehensive back engagement.
- Posture Improvement: This exercise helps in correcting postural imbalances by strengthening the upper back and shoulders.
- Scapular Stability: The movement fosters better scapular retraction and depression, crucial for shoulder health.
- Grip Strength: As you use an overhand grip, the exercise aids in improving the grip, which is beneficial for other calisthenics movements.
- Ease of Modification: It’s simple to adjust the difficulty by altering the height of the bar or the angle of the body.
Safety Tips
- Proper Form: Maintain a neutral spine and avoid sagging hips to prevent lower back strain.
- Controlled Movements: Ensure slow, controlled motions to maximize muscle engagement and minimize injury risk.
- Warm-Up: Proper warming up before performing inverted rows is essential to prepare the muscles and joints for the exercise.
Common Mistakes
- Hip Sagging: Allowing the hips to drop disrupts the body alignment and reduces exercise effectiveness.
- Short Range of Motion: Aim to bring the chest as close to the bar as possible without compromising form.
- Rounded Shoulders: Avoid letting the shoulders round forward; keep them back and down to fully engage the correct muscles.
Incorporating inverted rows into a workout routine can significantly contribute to achieving a robust and well-balanced upper body. Its versatility and effectiveness make it a recommended exercise for both beginners and advanced calisthenics enthusiasts.
Australian Pull-Ups: Perfect for Beginners
Australian pull-ups, also known as bodyweight rows or inverted rows, serve as an exceptional starting point for those new to calisthenics or for individuals lacking the upper body strength for traditional pull-ups. This exercise targets the upper back, lats, and biceps, promoting muscle endurance and strength building.
Benefits
- Accessibility: Can be performed with minimal equipment such as a low bar, suspension trainer, or even a sturdy table.
- Scalability: Easily adjustable to increase or decrease difficulty by altering the angle of the body.
- Joint-Friendly: Provides a less stressful option for those with shoulder or elbow issues when compared to other pull-up variations.
How to Perform
- Set Up: Find a horizontal bar positioned about waist height. This can be a squat rack, low pull-up bar, or any secure bar.
- Hand Placement: Grip the bar with an overhand, shoulder-width grip. If using a suspension trainer, ensure handles are secure.
- Body Position: Position the body underneath the bar, extending the legs out straight, making sure the heels rest on the ground. The body should form a straight line from head to heels.
- Initiate Pull: Engage the core and glutes. Pull the chest towards the bar, aiming to touch the bar with the lower chest.
- Lower Control: Slowly lower the body back to the starting position, keeping the body straight and controlled.
- Repeat: Aim for 3 sets of 8-12 repetitions, adjusting the difficulty by changing the angle or using a different grip if needed.
Progressions and Variations
- Bent Knees: Start with bent knees to reduce the amount of body weight lifted.
- Feet Elevated: Increase difficulty by elevating the feet on a bench or step stool.
- Weighted: Use a weight vest or hold a weight plate to increase resistance for advanced levels.
Tips for Maximum Effectiveness
- Keep the body rigid throughout the movement, avoiding sagging or arching.
- Focus on pulling with the back muscles rather than the arms to maximize back engagement.
- Maintain a neutral head position; avoid craning the neck or tucking the chin excessively.
Common Mistakes to Avoid
- Sagging Hips: Ensure that hips stay in line with the body; do not let them drop.
- Rushed Movements: Perform each repetition slowly and with control to maximally engage muscles.
- Flared Elbows: Keep elbows tucked in towards the body to avoid shoulder strain.
Archer Pull-Ups: Adding Uneven Load for Strength
Archer pull-ups are an advanced pull-up variation effective for developing unilateral strength and muscle balance in the upper body. Archer pull-ups involve pulling up with one arm more dominant while the other arm assists for support, thereby placing more load on one side at a time. This uneven distribution of load not only engages the muscles differently but also helps correct strength imbalances and improves overall muscular coordination.
To perform archer pull-ups:
- Grip the Bar: Begin by gripping the pull-up bar with hands placed wider than shoulder-width apart.
- Body Positioning: Keep the body straight and engage the core. This helps to stabilize the torso and avoid unnecessary swinging.
- Initiate the Pull: Pull up by directing most of your weight towards one side. For example, if focusing on the right arm, pull up forcefully with the right arm while the left arm extends almost straight out to the side, acting as a support.
- Achieve the Top Position: Aim to get your chin close to the pull-up bar, primarily using the stronger side’s arm.
- Controlled Descent: Lower yourself back to the starting position in a controlled manner, ensuring to keep focused strain on your working arm.
Key Benefits
- Unilateral Strength Development: Archer pull-ups focus on one side at a time, leading to balanced muscle growth and strength development.
- Reduced Risk of Imbalances: By working each side independently, this exercise can correct and prevent strength imbalances.
- Enhanced Coordination: The exercise demands greater muscle coordination and control, enhancing overall athletic performance.
- Progression to One-Arm Pull-Ups: Archer pull-ups serve as an excellent progression to mastering the highly advanced one-arm pull-up.
Tips for Mastery
- Warm-Up Properly: Ensure a comprehensive warm-up, focusing on shoulders, rotator cuffs, and upper back muscles.
- Start with Negatives: As this exercise is advanced, beginners might want to start by performing negative (eccentric) repetitions to build the necessary strength.
- Use Assistance Bands: Incorporate resistance bands if extra support is needed initially.
- Gradual Increase in Load: Gradually increase the load on your dominant side to prevent strain and injuries.
Implementing archer pull-ups into a calisthenics workout routine offers multiple benefits, solidifying their place as one of the best exercises for back strength development.
Commando Pull-Ups: Coordination and Strength in One Move
Commando pull-ups, also known as side-to-side pull-ups, are an advanced variation of the standard pull-up that incorporates lateral movement and grip variation, targeting multiple muscle groups in the upper body. This move not only enhances back strength but also improves coordination, making it a staple for those seeking to elevate their calisthenics training.
Execution Steps:
- Positioning:
- Stand beneath a pull-up bar and grasp it with a mixed grip, where one hand is in an overhand (pronated) position and the other in an underhand (supinated) position, similar to holding a rope.
- Your hands should be positioned close together, about shoulder-width apart.
- Initiate the Pull:
- Engage your core and retract your shoulder blades.
- Begin pulling your body up towards the bar while simultaneously shifting your weight laterally towards the arm in the underhand grip.
- Reach the Top:
- Aim to bring your chin towards the hand in the underhand grip.
- Pause momentarily at the top of the movement, focusing on squeezing your back muscles.
- Descend and Repeat:
- Lower your body in a controlled manner to the starting position.
- On the next rep, shift your body laterally towards the opposite hand (the one in the overhand grip).
- Continue alternating sides with each repetition.
Benefits:
- Increased Back Strength: Commando pull-ups engage the latissimus dorsi, rhomboids, and trapezius muscles more intensely than standard pull-ups due to the additional lateral movement.
- Improved Coordination: The need to shift weight from side to side enhances neuromuscular coordination and balance.
- Core Engagement: The movement requires significant abdominal muscle activation to maintain body stability, thus strengthening the core.
- Grip Strength: The mixed grip position demands greater forearm and grip strength, benefiting overall pulling power.
Tips for Success:
- Warm-Up: Ensure to warm up your shoulders and arms properly to prevent injury.
- Control: Focus on controlled movements to fully engage the target muscles and maintain proper form.
- Gradual Progression: Beginners might start with assisted pull-ups or partial movements, gradually building up to full commando pull-ups.
- Breathing: Inhale before you pull up and exhale as you lower down, ensuring a steady breathing rhythm.
By integrating commando pull-ups into their routine, individuals can develop both strength and coordination, making it a versatile and effective exercise for a more powerful upper body.
Muscle-Ups: Combining Pull and Push for Total Upper Body Power
The muscle-up is a compound calisthenics movement that merges the pull-up and dip into a seamless motion, targeting multiple muscle groups for comprehensive upper body strength. Essential for advanced calisthenics athletes, it combines pulling and pushing dynamics to develop explosive power and coordination.
Primary Muscle Groups Engaged
- Lats: The muscle-up begins with a pull-up motion that heavily engages the latissimus dorsi, essential for a broad back.
- Biceps: During the initial pull-up phase, the biceps are activated to assist in lifting the body upwards.
- Triceps: As the movement transitions into the dip, the triceps get engaged to push the body over the bar.
- Deltoids: The shoulders stabilize the movement throughout both phases, ensuring smooth execution.
- Pectorals: The final push over the bar involves the chest muscles to a significant extent.
Benefits of Muscle-Ups
- Functional Strength: Incorporates both pulling and pushing, essential for real-world physical activities.
- Core Stability: Engages the core throughout the motion, enhancing stability and control.
- Grip Strength: Requires and develops a strong grip, beneficial for various other calisthenic exercises.
- Explosiveness: Trains for explosive power, useful in sports and other physical disciplines.
- Coordination: Improves body coordination and spatial awareness, vital for advanced movements.
Technique for Proper Execution
- Grip: Start with an overhand grip, hands shoulder-width apart.
- Pull Phase: Engage the lats and biceps, initiating a powerful pull-up to get the chin above the bar.
- Transition: As the body rises, lean forward slightly and transition your wrists over the bar.
- Push Phase: Push down with the triceps and shoulders, moving the body into a dip position above the bar.
- Lockout: Extend the elbows completely at the top before lowering yourself back down in a controlled manner.
Common Mistakes to Avoid
- Poor Wrist Transition: Not effectively transferring from the pull-up to dip position can lead to failed attempts.
- Kipping Excessively: Relying too much on momentum rather than muscle engagement can diminish the exercise’s effectiveness.
- Lack of Full Range of Motion: Neglecting to fully extend at the top and bottom can reduce muscle activation.
Mastering the muscle-up offers not just strength but also a demonstration of technical skill in calisthenics. Practicing this movement consistently yields significant upper body benefits while enhancing overall athleticism.
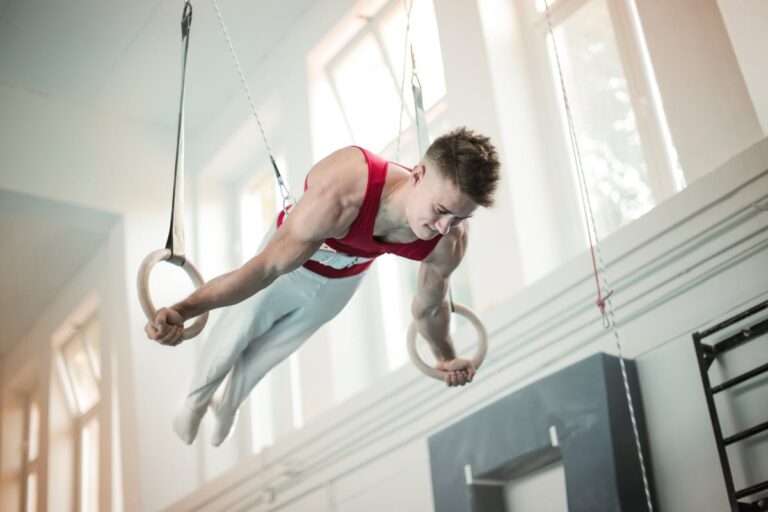
Front Lever: The Ultimate Back Strengthener
The front lever is a dynamic, advanced calisthenics exercise that significantly fortifies the back, core, and shoulders. Achieving this challenging move requires a combination of strength, control, and technique.
Benefits of the Front Lever
- Enhanced Back Strength: The front lever predominantly engages the latissimus dorsi, rhomboids, and trapezius muscles, making it a powerhouse move for back development.
- Core Stability: Maintaining the front lever position demands exceptional core strength. The abs, obliques, and lower back work in unison to keep the body horizontally parallel to the ground.
- Improved Shoulder Mobility: The deltoids and rotator cuff muscles are heavily involved, contributing to greater shoulder stability and mobility.
Muscles Worked
- Primary Muscles:
- Latissimus dorsi
- Rhomboids
- Trapezius
- Secondary Muscles:
- Abdominals
- Obliques
- Erector spinae
- Deltoids
How to Perform the Front Lever
- Initial Position: Begin by hanging from a pull-up bar with a pronated grip (palms facing away). Arms should be shoulder-width apart.
- Engage the Core: Tighten the core and glutes, and initiate a slight posterior pelvic tilt to align the body.
- Raise Your Legs: Raise your legs in front of you, keeping them straight. Aim to form a 90-degree angle with your torso.
- Leverage the Back: Engage the lats and progressively lower your torso until it is parallel to the ground. The body should form a straight line from shoulders to toes.
- Hold: Maintain this position for as long as possible. Breathing steadily will help maintain the hold.
Tips for Beginners
- Tuck Progression: Start with a tucked front lever. Bend the knees and bring them close to the chest to make the exercise more manageable.
- Negative Reps: Practice negative repetitions by slowly lowering from an inverted hang to the front lever position.
- Consistent Practice: Regularly incorporate front lever progressions into your workout routine to build the necessary strength and technique.
Progressions and Variations
- Advanced Tuck: Extend your legs slightly from the tucked position as strength increases.
- One-Leg Front Lever: Extend one leg while keeping the other bent for a gradual progression towards the full front lever.
- Straddle Front Lever: Spread the legs apart to distribute the weight differently and challenge the muscles in a new way.
The journey to mastering the front lever is demanding but highly rewarding, offering unparalleled strength and stability benefits.
Back Lever: Building Lower Back and Core Together
The back lever is an advanced calisthenics exercise that targets the lower back and core while engaging shoulders and arms. Performing the back lever strengthens muscles along the entire posterior chain and improves overall body control.
How to Perform a Back Lever
- Warm-Up: Do dynamic stretches and joint rotations targeting shoulders, wrists, and core.
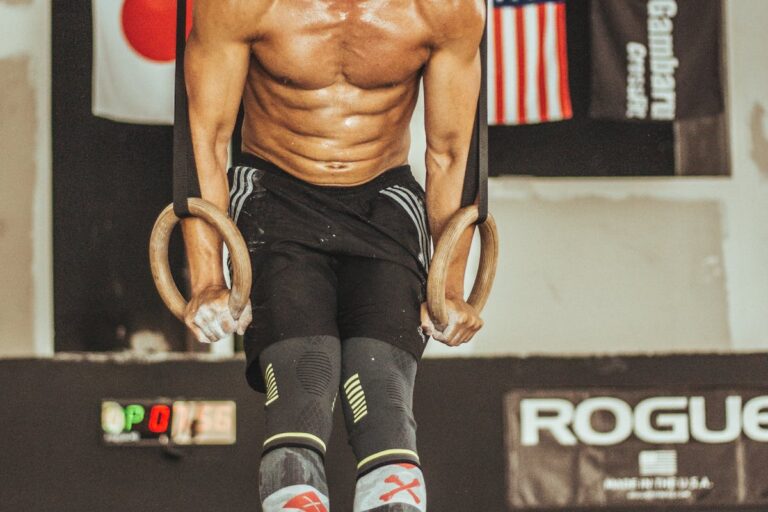
- Initial Position: Hang from a pull-up bar or gymnastic rings using an overhand grip.
- Tuck Position: Bring the knees to the chest and rotate the body backward, engaging core muscles.
- Straighten the Body: Slowly extend the legs and keep the body horizontal to the ground. Maintain a slight hollow body position by squeezing the glutes and engaging the abs.
- Hold: Sustain the position for as long as possible while keeping the body tight and straight.
- Exit: Safely return to the hanging position by bending the knees and rotating back to the initial position.
Progressions for Beginners
- Tuck Back Lever: Start with knees tucked to make the exercise easier.
- One-Leg Back Lever: Extend one leg while keeping the other leg tucked for intermediate difficulty.
- Straddle Back Lever: Spread the legs wide apart for balance while reducing the load on the core.
Tips for Success
- Consistency: Regular practice is key for developing the strength required for a full back lever.
- Engage Core: The core must remain tight and actively engaged throughout the exercise.
- Shoulder Mobility: Good shoulder mobility can reduce strain and improve the form.
- Progressive Overload: Gradually increase the difficulty by moving from simpler variations to the full back lever.
Benefits of the Back Lever
- Lower Back Strength: Enhances the strength and endurance of lower back muscles.
- Core Stability: Engages deep core muscles that are essential for overall stability.
- Improved Posture: Strengthens posterior muscles, contributing to better posture.
- Upper Body Control: Increases control and coordination in shoulder and arm muscles.
Common Mistakes
- Sagging Hips: Ensure the hips remain level with the torso to avoid undue strain.
- Bent Elbows: Keep the arms straight to fully engage the shoulders and back.
- Rapid Progressions: Avoid skipping progressions to minimize the risk of injury.
The back lever is a comprehensive exercise that, when done correctly, can build a robust lower back and core, contributing significantly to upper body strength and stability.
Scapular Pull-Ups: Targeting Upper Back Strength
Scapular pull-ups are an essential exercise within calisthenics for those aiming to enhance their upper back strength. They focus on isolating and targeting the muscles around the scapula, or shoulder blades, contributing to improved posture, shoulder stability, and overall back strength.
Benefits of Scapular Pull-Ups
- Upper Back Strengthening: By concentrating on scapular movement, these pull-ups specifically engage the muscles in the upper back.
- Improved Shoulder Stability: Regular practice helps in strengthening the muscles that stabilize the shoulder blades.
- Enhanced Posture: Strengthening the upper back can lead to better spinal alignment and posture.
- Foundation for Advanced Movements: Scapular pull-ups create a solid foundation for more advanced calisthenics exercises like the muscle-up or front lever.
Muscles Worked
- Latissimus Dorsi: Important for overall back strength.
- Rhomboids: Located between the shoulder blades and essential for scapular retraction.
- Trapezius: Important for both elevation and retraction of the scapula.
- Serratus Anterior: Helps in the upward rotation of the scapula.
How to Perform Scapular Pull-Ups
- Starting Position: Hang from a pull-up bar with a grip slightly wider than shoulder-width, arms fully extended.
- Engage the Scapula: Initiate the movement by squeezing your shoulder blades together and down. There should be minimal to no movement in the arms; the action should come from the shoulders.
- Hold Briefly: Once your scapula is retracted, hold the position for 1-2 seconds to maximize muscle engagement.
- Return to Start: Slowly release the contraction, allowing your shoulder blades to elevate back to a relaxed hanging position.
- Repeat: Perform 2-3 sets of 10-12 repetitions, ensuring focused and controlled movements.
Tips for Effectiveness
- Avoid Elbow Movement: Maintain focus on shoulder blade movement, minimizing any elbow bending.
- Controlled Movements: Ensure all movements are slow and controlled to maximize muscle engagement.
- Consistency: Regular practice leads to noticeable improvements in upper back strength.
Progressions
Once proficient, increase difficulty by adding:
- Weighted Variations: Hold a small weight between the feet or use a weighted vest.
- Towel or Rope Variations: Use towels or ropes to challenge grip strength along with upper back muscles.
Incorporating scapular pull-ups into a calisthenics routine can significantly enhance upper back strength and pave the way for mastering more complex exercises.
Bodyweight Rows: Horizontal Pulling Exercise
Bodyweight rows, also known as Australian pull-ups or inverted rows, are a highly effective horizontal pulling exercise. This calisthenics exercise primarily targets the muscles of the upper back, including the latissimus dorsi, rhomboids, and trapezius. Additionally, bodyweight rows engage the biceps and forearms, making them a comprehensive upper body workout.
Benefits
- Improves Upper Body Strength: By focusing on pulling motions, bodyweight rows enhance upper body strength, crucial for various physical activities.
- Enhances Posture: Strengthening back muscles improves posture, helping counteract the effects of prolonged sitting and desk work.
- Versatility and Accessibility: This exercise requires minimal equipment, often just a bar or sturdy surface, making it easy to do virtually anywhere.
- Aids in Muscle Balance: Complementing vertical pulling exercises like pull-ups, bodyweight rows ensure balanced muscle development in the upper body.
How to Perform Bodyweight Rows
- Setup:
- Find a stable horizontal bar, such as a Smith machine, squat rack, or even parallel bars in a park.
- Adjust the bar to waist height.
- Starting Position:
- Lie on the floor beneath the bar and grasp it with an overhand grip, shoulder-width apart.
- Extend the legs straight out and keep the body in a straight line from head to heels, supporting weight on the heels.
- Execution:
- Pull the chest towards the bar, retracting the shoulder blades.
- Keep the body rigid and avoid sagging or raising the hips.
- Hold briefly at the top of the movement, then slowly lower back to the starting position.
- Repetitions and Sets:
- Beginners can start with 3 sets of 8-10 repetitions.
- Gradually increase the number of sets and reps as strength improves.
Variations and Progressions
- Bent Knees: Keep the knees bent with feet flat on the floor to reduce the difficulty.
- Weighted Rows: Add weight by wearing a weighted vest or placing a plate on the stomach.
- One-Arm Rows: Perform the exercise with one arm to increase difficulty and engage the core more intensely.
Common Mistakes to Avoid
- Improper Form: Ensure the body remains in a straight line without sagging hips.
- Rushed Movements: Perform movements slowly to maximize muscle engagement.
- Overextension: Avoid hyperextending the neck or lower back.
Overall, bodyweight rows are an essential horizontal pulling exercise in a balanced calisthenics routine.
Tips for Progression and Injury Prevention
Incorporating calisthenics into a fitness regimen can yield significant benefits for the upper body. However, it’s crucial to follow best practices to avoid injuries and ensure consistent progress.
Warm-Up and Cool Down
- Dynamic Stretches: Include exercises like arm circles and shoulder rolls in the warm-up to increase blood flow to the muscles.
- Static Stretching: Post-workout stretching can improve flexibility and reduce muscle soreness.
Gradual Progression
- Incremental Load: Start with easier variations of exercises. For example, begin with Australian pull-ups before advancing to full pull-ups.
- Consistent Reps: Gradually increase the number of repetitions and sets over time.
Proper Technique
- Focus on Form: Ensure correct posture to engage the appropriate muscle groups and avoid strain.
- Controlled Movements: Execute exercises slowly and deliberately to maximize muscle engagement and reduce injury risk.
Rest and Recovery
- Adequate Rest: Allowing muscles to recover between sessions is vital for growth and preventing overtraining. Incorporate rest days into the routine.
- Sleep: Prioritize quality sleep, as it is essential for muscle recovery and overall well-being.
Injury Prevention
- Listen to the Body: Be mindful of any discomfort or pain. Ignoring signals can lead to severe injuries.
- Joint Health: Perform exercises that enhance joint stability and mobility, such as scapular retractions and wrist rotations.
Nutrition and Hydration
- Balanced Diet: Proper nutrition supports muscle recovery and growth. Focus on protein intake and other essential nutrients.
- Stay Hydrated: Dehydration can impair performance and recovery. Drink water consistently throughout the day.
Diversified Routine
- Muscle Variability: Target different muscles by including various exercises in the routine.
- Avoid Monotony: Maintain motivation and prevent plateaus by regularly updating the workout plan.
Mental Focus
- Mind-Muscle Connection: Concentrate on the muscle being worked to enhance effectiveness.
- Positive Mindset: Stay motivated by setting realistic goals and celebrating progress.
Implementing these practices can help ensure safe and effective progression in calisthenics, paving the way for a stronger upper body.
Conclusion: Building a Balanced and Strong Upper Body with Calisthenics
Incorporating calisthenics into an upper body workout regimen offers numerous benefits, making it a practical and effective method for strength training. By focusing on exercises that target various muscle groups within the back, individuals can achieve not only a stronger upper body but also improved posture and reduced risk of injury.
The key to balanced development lies in the diversity of exercises. Ensuring that different movements are included helps in targeting different muscle fibers and angles. This approach prevents muscle imbalances and ensures a comprehensive strength-building routine. Here are crucial points to consider:
- Variety of Exercises: Engaging multiple muscles through varied movements is essential. Incorporating pull-ups, chin-ups, rows, and planks covers a wide range of muscle groups.
- Progressive Overload: Gradually increasing the intensity of the exercises ensures continuous muscle growth and strength gains.
- Form and Technique: Proper technique is crucial to maximize benefits and prevent injuries. Focus on controlled movements and correct form.
- Consistency: Regular and consistent workouts bring about the best results. Ensuring a disciplined routine contributes significantly to upper body strength.
- Recovery and Rest: Allowing muscles time to recover is vital. Include rest days and proper nutrition in the training plan.
Important Calisthenics Back Exercises:
- Pull-Ups: Engages the lats, traps, and rhomboids. Variations like wide grip and close grip enhance different parts of the back.
- Chin-Ups: Focuses more on the biceps while also targeting the back. A narrower grip compared to pull-ups.
- Bodyweight Rows: Targets the middle and upper back muscles. Can be performed using rings or a bar.
- Superman Exercise: Strengthens the lower back by lifting the arms and legs simultaneously in a prone position.
- Plank Rows: Combines core stabilization with back muscle engagement, enhancing overall upper body balance.
- Reverse Snow Angels: Targets upper back and shoulder muscles through a lying position movement resembling a snow angel.
A balanced calisthenics regime allows for the harmonious development of the upper body’s muscular structure. Employing varied exercises, maintaining proper form, and adapting to progressively higher intensities significantly contribute to long-term strength and fitness. This, amalgamated with consistency and proper recovery, paves the way for a formidable, balanced, and healthy upper body.
